HOME IMPROVEMENT: PAINTING HINTS
HOME IMPROVEMENT – PAINTING TIPS AND TECHNIQUES
A few days ago, I told you about the 2016 Paint Color Trends.
But more than picking the right color, is knowing some tricks of the trade to make your paint look its best.
According to an article in Popular Mechanics:
Professional painters are fast, efficient, and have mastered techniques that produce top-notch results while making it all look easy. Each painter has slightly different methods and preferences, but the pros all know the trade secrets, including the following tips.
SAND AWAY FLAWS
You have to start with a perfectly smooth surface to end up with perfectly painted walls or woodwork. One pro says that sander would be a more fitting job title than painter since he spends so much time pushing sandpaper. Sanding levels out spackle or joint-compound patches and flattens ridges around nail holes. Sanding also removes burrs and rough spots in your trim.
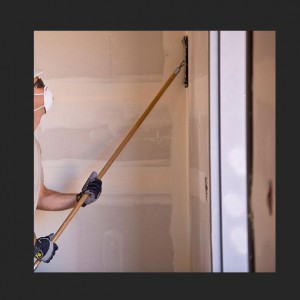
Sand the walls from the baseboard to the ceiling with fine grit sanding paper on a sanding pole. Then sand horizontally along the baseboard and ceiling. Don’t put a lot of pressure on the sanding pole or the head can flip over and damage the wall. Sand woodwork with a sanding sponge to get into crevices.
USE TINTED PRIMER
Before the pros paint walls, they fill holes and patch cracks with joint compound. But if you paint directly over it, the compound will suck the moisture out of the paint, giving it a flat, dull look (a problem called “flashing”). Those spots will look noticeably different than the rest of the wall. To avoid that, pros prime the walls before painting.
Instead of using white primer, pros usually have it tinted gray or a color that’s similar to the finish paint. Tinted primer does a better job of covering the existing paint color than plain primer, so your finish coat will be more vibrant and may require fewer coats. This is especially true with colors like red or orange, which could require three or more coats without a primer.
SCRAPE A RIDGE INTO POPCORN OR TEXTURED CEILINGS

The problem with painting along the edge of textured ceilings is that it’s almost impossible to get a straight line along the top of the wall without getting paint on the ceiling bumps. Pros have a simple solution. They run a screwdriver along the perimeter of the ceiling to scrape off the texture. “This lets you cut in without getting paint on the ceiling texture,” one of our pros says. “The screwdriver creates a tiny ridge in the ceiling, so the tips of your paint bristles naturally go into it. And you’ll never even notice the missing texture.”
DROP CLOTHS – DON’T USE SHEETS
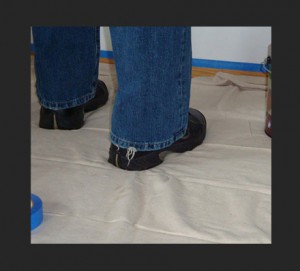
 Pros don’t use bed sheets as drop cloths, and neither should you. Thin sheets won’t stop splatters and spills from seeping through to your flooring. And while plastic can contain spills, the paint stays wet for a long time. That wet paint can (and usually does) find the bottom of your shoes and get tracked through the house.
Use what the pros use—canvas drop cloths. They’re not slippery and they absorb splatters (but still wipe up large spills or they can bleed through). “Unless you’re painting a ceiling, you don’t need a jumbo-size cloth that fills the entire room,” a pro says. “A canvas cloth that’s just a few feet wide and runs the length of the wall is ideal for protecting your floor, and it’s easy to move.”
BOX YOUR PAINT – IN A BUCKET
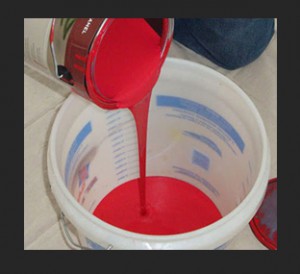
 The “same” color of paint can vary between cans. “That difference can be glaringly obvious if you pop open a new gallon halfway through a wall,” a retired painter tells PM. To ensure color consistency from start to finish, pros mix their cans of paint in a 5 gallon bucket (a process called “boxing”).
Some pros then paint directly out of the bucket. This eliminates the need to pour paint into a roller tray, though the heavy bucket is harder to move.
If you want a professional painting or remodeling experience contact your local contractor, like Leading Edge Homes. Inc.
Want to see some of our work? Visit our website or view our online book.
Todd Perry, a State of Florida Certified Building Contractor and president of Leading Edge Homes, Inc., provided this information.
If you have questions about a home improvetment project, call Leading Edge Homes at 561-795-2551 or email Todd at: todd@leadingedgehomes.com and he’ll be happy to share his knowledge with you.
Leading Edge Homes, Inc. specializes in improving your lifestyle through room additions, bathroom renovations, kitchen updates, hurricane-resistant screen enclosures, and more! In business since 1991, they demolish your stress by building your trust.Visit the Leading Edge Home’s website or call 561-795-2551 to discover how they can help you with your next home remodeling project in Palm Beach County.


